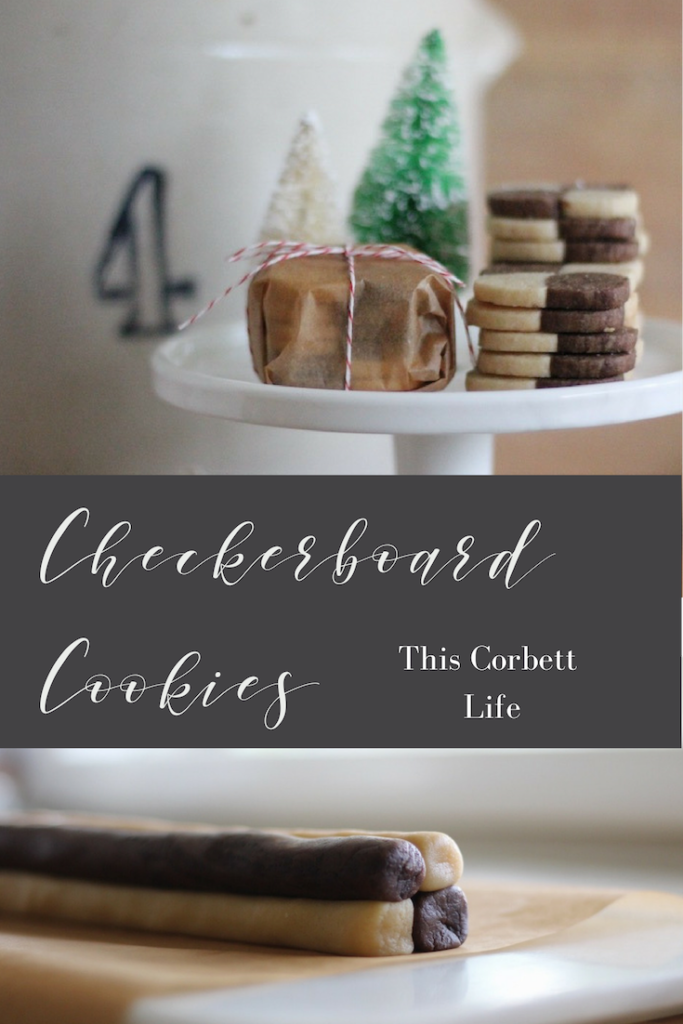
These buttery little checkerboard cookies add some sweet pattern to your Christmas cookie box or exchange. Here I show you how to make them.
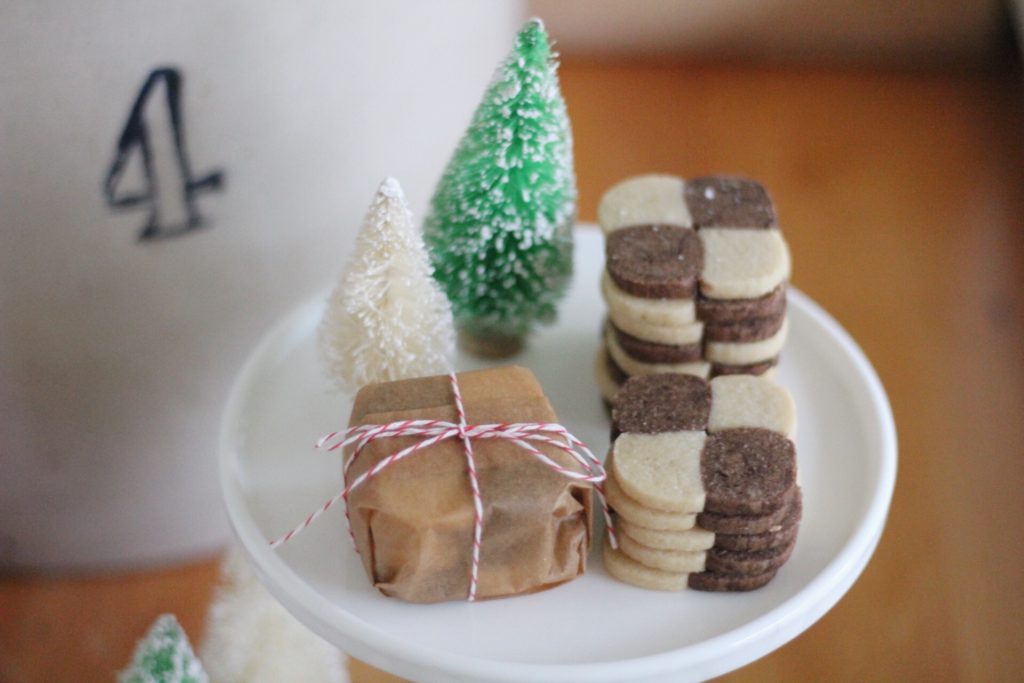
Well, baking season has officially started in the Corbett house. Especially Christmas cookies!!! I am kicking it off on the here with our Checkerboard Cookies.
In this kickoff, I am collaborating with some of my new blogger friends. It is so nice to be included in this new adventure and see all of the yummy recipes coming out of their kitchens. Stay tuned below for links to all the other festive recipes!
The most wonderful time of the year.
I don’t want to get too deep on you here, but there is just something so magical about this time of year. And since having Dalton, it has completely changed how I view the holiday season and the true meaning. Part of the magic is being created with the traditions that you make within your own family. The moments and actives that you participate in make the memories that last forever.
When I was a kid we had a babysitter that I just adored! Every year her family would make Christmas cookie tins for their loved ones. We looked forward to the tin every year! She would still deliver us one even after moving on from her babysitting days. So when I think about traditions that I want to build with my family, Christmas cookies are right up there.
This post contains affiliate links, which means I make a small commission at no extra cost to you.
The beauty of these little checkerboard cookies is that you don’t really need any specialty tools. Now, you will want to use an electrical mixer to form the dough to start. I ADORE mine from KitchenAid and use it all the time! From then on out you will only really need your hands and a knife.
Tools you need for baking
- Electric mixer with flat beater paddle
- a few measuring cups and spoons
- silicone spatula
- parchment paper
- knife
- baking sheets
- baking rack
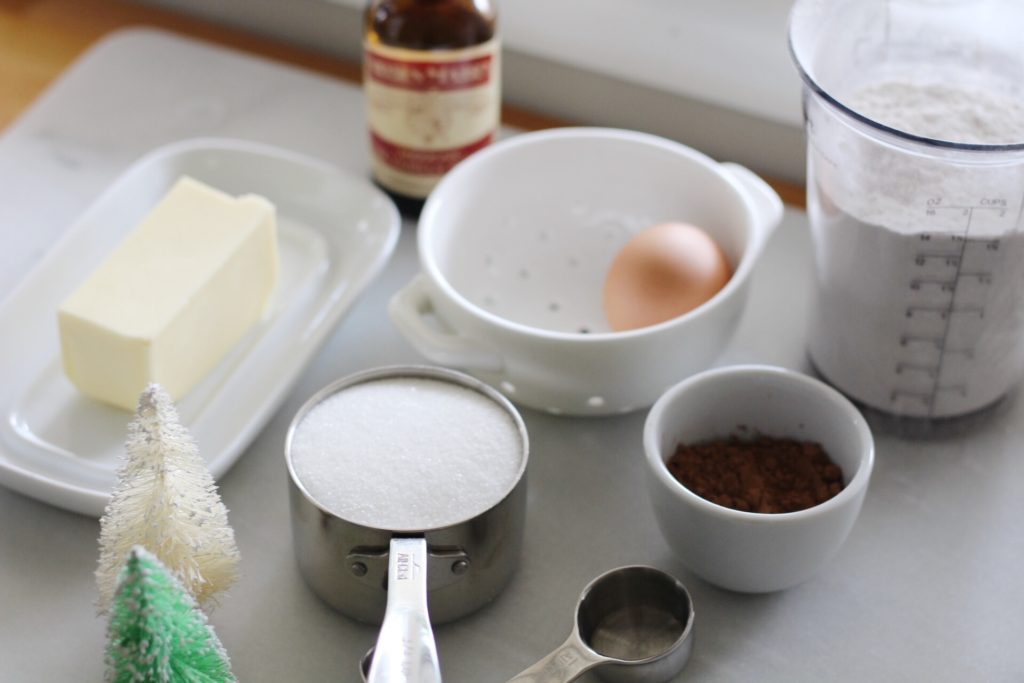
Checkerboard Cookie Ingredients
- 1/2 cup (1 stick) unsalted butter, at room temperature
- 3/4 cup sugar
- 1-1/2 tsp vanilla extract
- 1-3/4 cups all-purpose flour
- 1 egg
- 2 Tbsp unsweetened dark cocoa powder (at least 70%)
Checkerboard Cookie Instructions
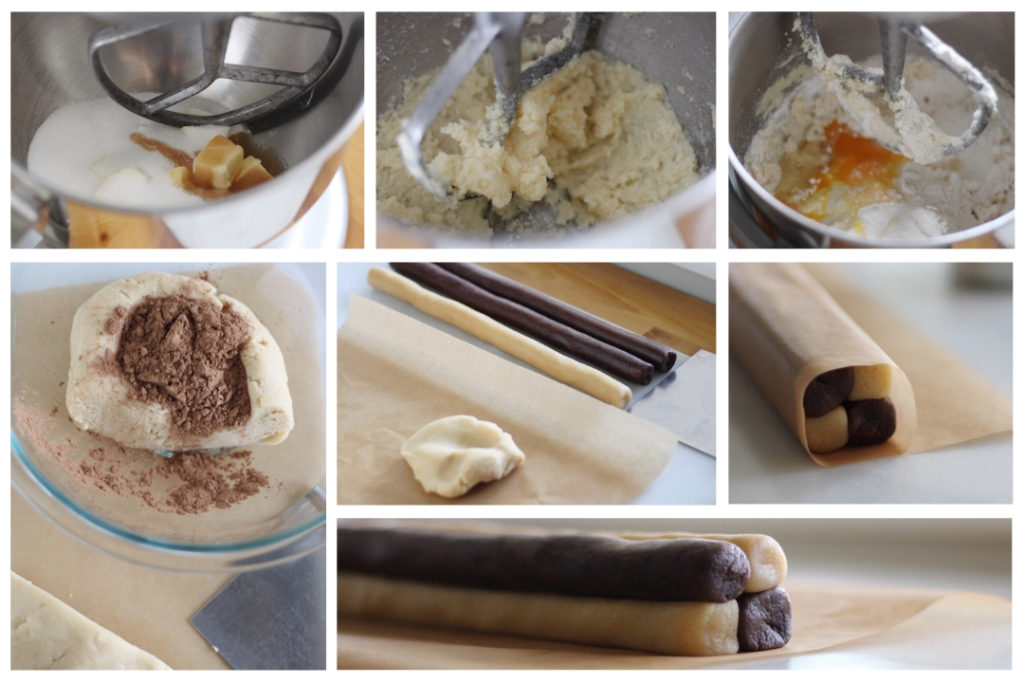
- In the bowl of an electric mixer fitted with the flat beater paddle, beat together the butter, sugar and vanilla on medium speed until light and fluffy, about 2 minutes.
- Sift the flour. Add half of the flour to the butter mixture and beat on medium-low speed until just combined. Add the egg and the remaining flour and beat until completely combined, 1 to 2 minutes.
- Transfer the dough to a sheet of parchment paper and divide in half. Place 1 piece of dough in a medium bowl and add the cocoa. Using a silicone spatula or your hands, fold until completely combined. Make sure the dough takes on the dark color of the cocoa with no visible streaks of plain dough.
- Divide each piece of dough (plain and chocolate) in half so you have 2 pieces of plain dough and 2 pieces of chocolate dough. On another sheet of parchment paper, using your hands, roll each piece of dough into a cylinder about 12 inches long.
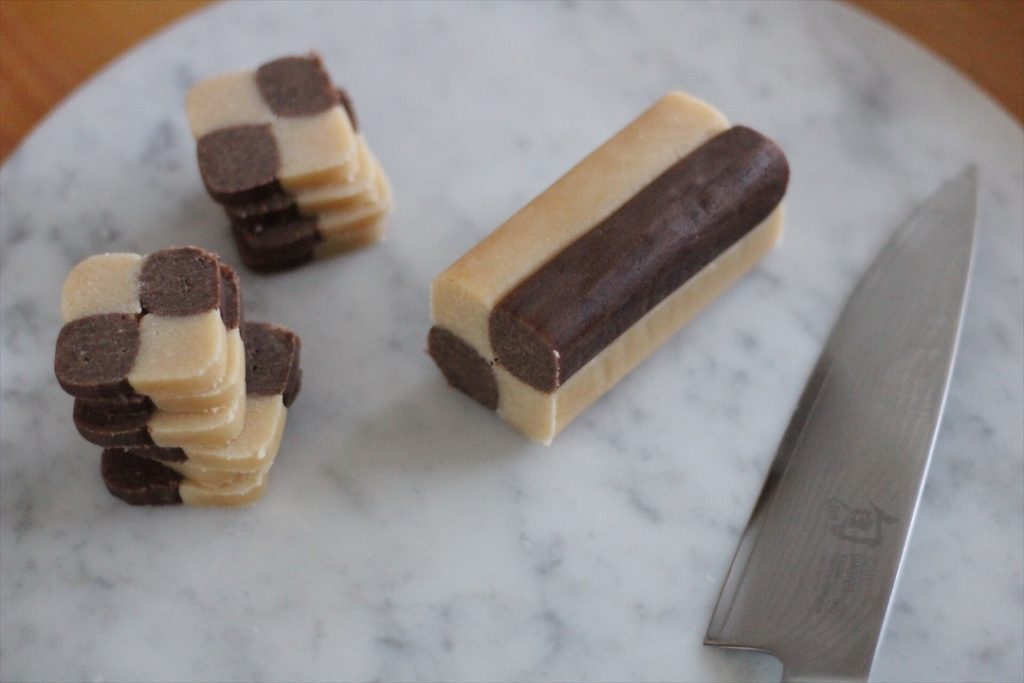
- Keeping the dough on the parchment, arrange the cylinders to form a checkerboard pattern: Place 1 chocolate cylinder next to a plain cylinder and lightly press them together. Then layer the top, reversing the order of the 2 cylinders. Wrap the log of dough with parchment paper along its length. Smooth the edges and gently press the cylinders together using the outer parchment paper to create a cleaner finish, more squared off finish. Refrigerate until the dough is firm, about 1 hour.
- Preheat an oven to 350°F. Line 2 baking sheets with parchment paper.
- Remove the dough from the refrigerator and unwrap it. Using a sharp knife, cut the dough crosswise into slices about 1/4 inch thick. Place on the prepared baking sheets, spacing the cookies about 1-2 inches apart. Refrigerate the cookies on baking sheets until firm, about 10 minutes.
- Bake until the cookies are just turning golden brown at the edges, 10 to 15 minutes. Transfer the baking sheets to wire racks and let cool for 5 minutes, then transfer the cookies to the racks and let cool completely. Store in an airtight container at room temperature. Makes about 55 cookies.
One final touch
One special little add on that I like to do is to add just a tiny sprinkle of sea salt on top of the cookies as they come out of the oven. But then again, I’m a salty sweet kind of snacker. It’s just too good!
Checkerboard Cookies
Ingredients
- 1/2 cup 1 stick unsalted butter, at room temperature
- 3/4 cup sugar
- 1 1/2 tsp vanilla extract
- 1 3/4 cups all-purpose flour
- 1 egg
- 2 Tbsp unsweetened dark cocoa powder at least 70%
Instructions
- In the bowl of an electric mixer fitted with the flat beater paddle, beat together the butter, sugar and vanilla on medium speed until light and fluffy, about 2 minutes.
- Sift the flour. Add half of the flour to the butter mixture and beat on medium-low speed until just combined. Add the egg and the remaining flour and beat until completely combined, 1 to 2 minutes.
- Transfer the dough to a sheet of parchment paper and divide in half. Place 1 piece of dough in a medium bowl and add the cocoa. Using a silicone spatula or your hands, fold until completely combined. Make sure the dough takes on the dark color of the cocoa with no visible streaks of plain dough.
- Divide each piece of dough (plain and chocolate) in half so you have 2 pieces of plain dough and 2 pieces of chocolate dough. On another sheet of parchment paper, using your hands, roll each piece of dough into a cylinder about 12 inches long.
- Keeping the dough on the parchment, arrange the cylinders to form a checkerboard pattern: Place 1 chocolate cylinder next to a plain cylinder and lightly press them together. Then layer the top, reversing the order of the 2 cylinders. Wrap the log of dough with parchment paper along its length. Smooth the edges and gently press the cylinders together using the outer parchment paper to create a cleaner finish, more squared off finish. Refrigerate until the dough is firm, about 1 hour.
- Preheat an oven to 350°F. Line 2 baking sheets with parchment paper.
- Remove the dough from the refrigerator and unwrap it. Using a sharp knife, cut the dough crosswise into slices about 1/4 inch thick. Place on the prepared baking sheets, spacing the cookies about 1-2 inches apart. Refrigerate the cookies on baking sheets until firm, about 10 minutes.
- Bake until the cookies are just turning golden brown at the edges, 10 to 15 minutes. Transfer the baking sheets to wire racks and let cool for 5 minutes, then transfer the cookies to the racks and let cool completely. Store in an airtight container at room temperature. Makes about 55 cookies.

Yesterday, our Blog Hop started with 7 fabulous cookie recipes. Today, the rest of us are wrapping it up. So please make sure to check out all the links listed below from the last two days worth of Christmas Cookies!
Monday’s sweets include:
Amanda at Cozy Tasty Home
Amy at Essentially Handmade Shop
Gabrielle at Life With the Correas
Jersey at Farmhouse-bc
Dana at St. Martha’s Lens
Anja at Our Gabled Home
Jenny at Yellow Rose Jenny
Tuesdays treats include:
Brianne at Homemade on our Homestead
Rachael at Australian Working Mama
Misty at Our Grace Filled Journey
Missy at Rambling Rose Farmhouse
Lyndsy at Treasured Oak Springs
Kelly at The Willow Mama
Callie Corbett these are beautiful, and I’m sure yummy too, you make it look so easy! Thanks for
sharing!
Thank you! They smell so good and are really not that hard. You just need a little patience while putting them together. The dough is pretty forgiving which always helps!
I love how fancy these cookies look! You make it look so easy! I will definitely be making these! I love how you pass on the tradition from your babysitter, she must have been an amazing person! Thank you for sharing!
I am so glad that you like them. They really are pretty simple(gotta love that). I also love that the cooling time in the fridge gives you time to clean up as you go along.
Wow! I can’t wait to try these!
I hope you do! Let me know what you think.
You will have to let me know what you think.
These cookies are so much fun! Thank you for sharing them 😉
I was so happy to get to be a part of such a fun and festive cookie exchange! Can’t wait to share many more!!